Whether you’re just getting started or continuing with an existing project, this blog is designed to assist you in achieving your goal to create a family photo archive.
Have you ever wished you could travel back in time, to that family vacation from your childhood or the day your favorite grandparent held you for the first time.
Having tangible reminders of these moments is essential for preserving precious memories of those past days. Building a family photo archive can easily help make that possible.
With a few simple steps and some dedication, you can create an album of images that span years and generations.
Step 1: Gather Your Tools
One of the biggest steps in building a family archive is assembling the necessary materials.
If you are looking to digitize a lot of photos, investing in a laptop and scanner is ideal. However, not every family has a scanner readily available.

Most digital cameras have an incredible amount of quality which can suffice if you do not own a scanner and are unable to purchase one at this time. Even your smartphone camera can be used if all else fails!
As long as you have access to either of those devices and a laptop, you can get started with digitizing your family photos as soon as possible!
Step 2: Reach Out to Your Family Members
To create a family photo archive, reaching out to those closest to you is a great place to start. Your uncles, aunts, and cousins are likely to have a lot of family pictures.
Old photo albums are also an excellent source for finding pictures of your relatives; these often contain images that have been passed down for generations.

Additionally, it’s worth exploring the internet for further information about your ancestors as well.
A simple Google search could reveal family trees, scanned documents from archives, and even old newspaper articles – all valuable resources when researching your family’s history
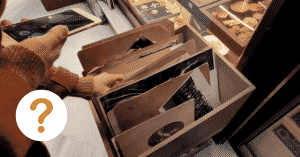
Step 3: Collect The Images
Whether you decide to ask your family members to send you their pictures or go visit them in person, it is important to keep track of who you’ve contacted.
Make a list of people and highlight each name with a different color as you reach out to them. Once they have sent their photos or you have scanned them after visiting, make sure to note that next to their names on the list for future reference.

Through this simple process, you can learn about your ancestors and create unique memories with your loved ones at the same time
Step 4: Scan Your Images or Take Pictures Of Them
Saving high-resolution image files is the best way to make sure all the details of a photo are captured.
The TIFF and RAW formats are especially good for this since they store more data than other types of files.
If you don’t have a scanner at home, no worries – your camera can be used instead to take pictures of the images in need and keep their quality intact.

To make it even better, consider adding metadata to each file – including names of people in the photo, the date taken, the owner, and any extra info related to it that could be useful in the future.
This will help you easily find every image and keep track of them later on.
Step 5: Restore Your Photos
Family photos are some of the most treasured items in any home. But unfortunately, over time many ends up damaged or faded by age and wear.
At MemoryCherish, we understand how important these photographs can be to you and your family, so we strive to restore them to their original condition.
Our team of expert photo restoration professionals makes sure to bring back the colors and details that were lost over the years – all while making sure the finished product looks just like new. With our help, you can enjoy these images for generations to come.
Step 6: Share Your Archive With Family Members
Sharing your family photo archive with your family is a great way to get everyone involved in preserving and remembering a variety of memories.
Digital copies can be sent out electronically to relatives that live across the country or the world, making them easily accessible no matter where they are.
You can also upload photos online to an album that can be shared with family members who have access to the Internet.

In addition, having physical copies printed can serve as tangible reminders of special occasions, or when collecting all of the photos together to produce CDs, each member of the family can have their keepsake.
By utilizing any one – or more -of these methods for sharing your photo archive with your family, every single relative will have access to a vast collection of meaningful memories that can be passed down for future generations to cherish.
How Do We Fix Your Picture?
Our restoration artists will closely examine your blurred image, remove stains, mold, blur, refine and add more detail and color to each picture. We won’t stop until your photographs are in the best condition. We can handle any damage on any photograph!

Our commitment to producing stellar quality restoration has even landed us on news reports by ABC, NBC, and FOX news.
What Do I Need To Do?
After separating your stuck photographs from each other, you need to make them clean and ready for restoration. You can check out how to clean your old pictures.
Next, you need to carefully scan this photograph. Then, you upload it and pick your restoration options.
You place your order, and that’s it.
How Long Does It Take?
We would restore and send a digital copy of your sharpened image back to you by email within 24 hours. If there is anything you would like us to change on your restored picture, revisions are allowed on every restoration, completely free!
We also offer nationwide delivery of restored images in prints!
Can I Contact Someone For More Information?
Our customer support is available 24/7 to answer any further questions. You can send us an email at: support@memorycherish.com.
In A Nutshell…
There you have it! A few easy steps to removing a picture from glass. If you follow these simple tips and something goes wrong, or your picture gets damaged in the process, don’t worry. We can help! Our team of experts is here to restore your photo and get it back on your wall where it belongs.
Chat with us today to get started.